jenkins编译.net结合ansible操作windows进行发布
2019-07-26

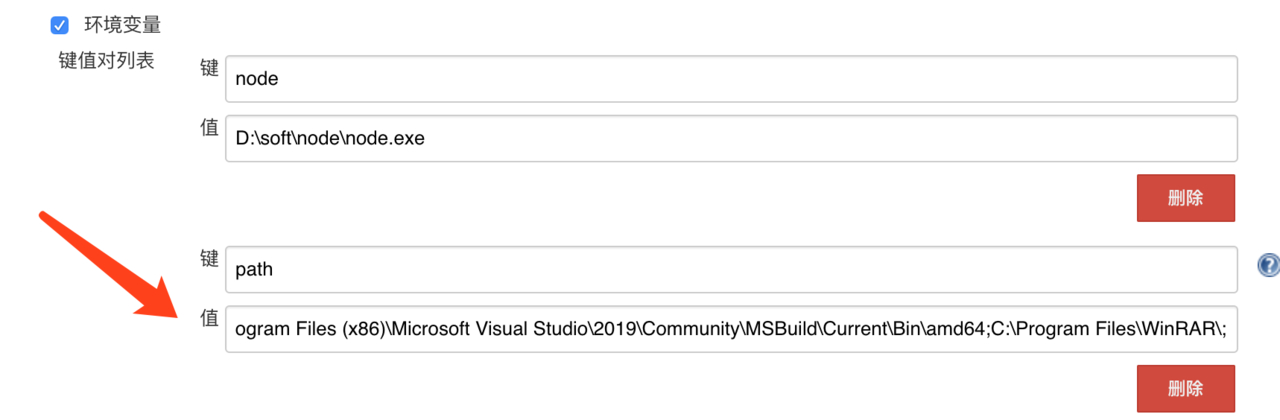
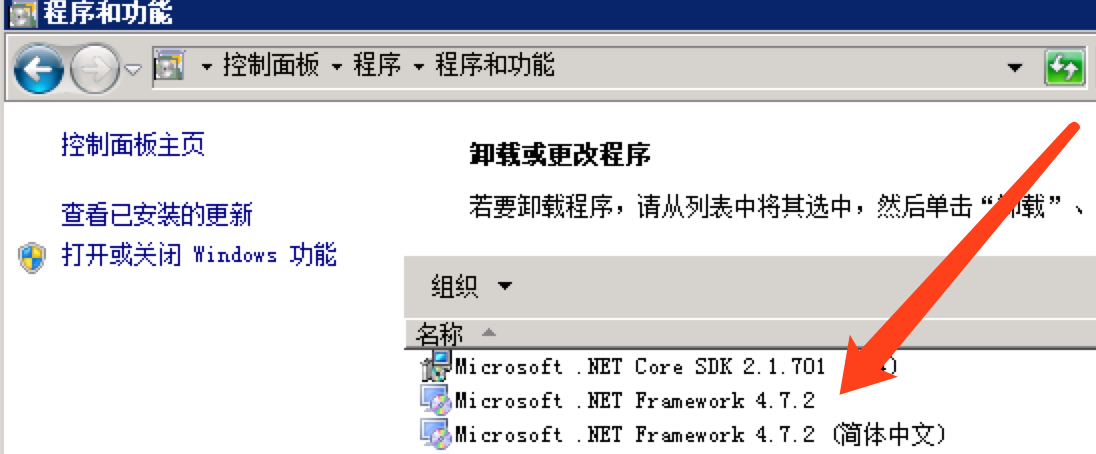
使用Jenkins编译.net项目需要用到windows的slave节点,安装依赖的工具:如MSBuild和.NET Framework, winrar等
MSBuild可以直接安装和开发使用一致版本的Visual Studio,使用其自带的MSBuild.exe,比如我这里安装了Visual Studio 2019对应的路径为C:\Program Files (x86)\Microsoft Visual Studio\2019\Community\MSBuild\Current\Bin\amd64\MSBuild.exe
把用到的工具的路径加入到windows slave配置环境变量path中
jenkins pipeline
pipeline {
    agent { label 'windows-slave' }
    parameters{
        gitParameter branchFilter: '.*', tagFilter: '.*', defaultValue: 'dev', name: 'TAG', type: 'PT_BRANCH_TAG', selectedValue: 'TOP', sortMode: 'DESCENDING_SMART'
        choice(name: 'PLAYBOOK', choices: 'net\nnet-rollback', description: 'net 部署\nnet-rollback 回滚')
        choice(name: 'HOSTS', choices: 'test-pms-group', description: '选择发布的主机组:\ntest-pms-group 测试环境')
    }

    environment {
        GIT = 'http://example.com/mgpms/MG_HuiZhu.git'
        PROJECT = 'MG_HuiZhu'
        APP_PATH = 'D:\\data\\apps\\MG_HuiZhu\\'
        BUILDFILE = 'MG_HuiZhu2.0\\Huazhu.PMS.WebSite\\Huazhu.PMS.WebSite.csproj'
        SOLUTIONDIR = "${WORKSPACE}\\MG_HuiZhu2.0\\"
        PACKAGE = "${WORKSPACE}\\MG_HuiZhu2.0\\Huazhu.PMS.WebSite\\obj\\Release\\Package\\PackageTmp\\"
        CONFIGURATION = 'Release'
        PLAYBOOK = "$PLAYBOOK" // ansible的的的palybook
        MAIL_TO = "yunwei@hhotel.com"
        ZIP = "target"
        CHECK_TAG = "${TAG}" // 分支或tag
    }

    stages {
        stage ('克隆代码') {
            steps {
                deleteDir() // 清理工作目录
                git credentialsId: '9c9b7b17-04d5-47de-9b8f-6207a78e6973', url: "${GIT}"
                bat 'git checkout %CHECK_TAG%'
            }
        }

        stage ('编译打包') {
            steps {
                script {
                    bat 'echo %TIME%'
                    bat 'MSBuild %BUILDFILE% /p:Configuration=%CONFIGURATION% /p:SolutionDir=%SOLUTIONDIR% /t:Rebuild /p:DeployOnBuild=true /p:AllowUntrustedCertificate=True'
                    bat 'rd /s/q D:\\jenkins\\workspace\\test-MG_HuiZhu\\MG_HuiZhu2.0\\Huazhu.PMS.WebSite\\Scripts\\Plugin\\My97DatePicker\\'
                    bat 'winrar a -ep1 -r target.zip %PACKAGE%'
                    stash(name: "target", includes: "target.zip")
                }
            }
        }

        stage ('部署') {
            agent { label "master" }
            environment {
                TIME = sh(script: "date '+%Y%m%d%H%M%S'", returnStdout: true).trim()
            }
            steps {
                deleteDir() // 清理工作目录
                unstash("target")
                ansiblePlaybook(
                    playbook: "/data/ansible/playbook/${PLAYBOOK}.yml",
                    extraVars: [
                        APP_PATH:"${APP_PATH}",
                        HOSTS:"${HOSTS}",
                        PROJECT:"${PROJECT}",
                        WORKSPACE:"${WORKSPACE}",
                        ZIP:"${ZIP}",
                        TIME:"${TIME}"
                    ]
                )
            }
        }
    }


}
playbook.yml
---
- hosts: "test-pms-all"
  serial: "50%"
  tasks:
    - name: create app dir
      win_command: CMD /C "md D:\data\apps\{{PROJECT}}"
      ignore_errors: True
    - name: create backup dir
      win_command: CMD /C "md D:\data\backup\{{TIME}}"
      ignore_errors: True
    - name: backup website
      win_copy:
        src: D:\data\apps\{{PROJECT}}
        dest: D:\data\backup\{{TIME}}
        remote_src: True
      ignore_errors: True
    - name: transfer artifacts to target hosts
      win_copy:
        src: "{{WORKSPACE}}/{{ZIP}}.zip"
        dest: D:\data\apps\{{PROJECT}}\
    - name: unzip artifacts
      win_unzip:
        src: D:\data\apps\{{PROJECT}}\target.zip
        dest: D:\data\apps\{{PROJECT}}
        creates: no
        delete_archive: yes
    - name: restart website
      win_iis_website: name={{PROJECT}} state=restarted
ansible使用wrm来对windows服务器进行操作。
要求:
.NET Framework 3.0以上
Powershell 3.0以上
开启winrm
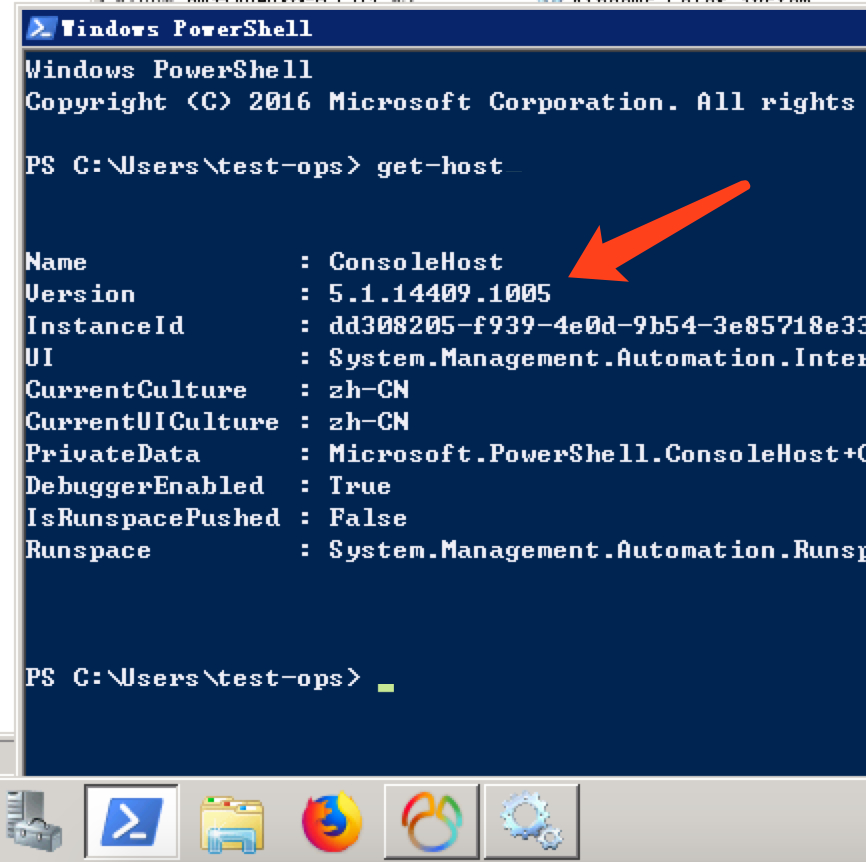

使用管理员权限打开Powershell
查看版本
get-host
更改powershell策略为remotesigned
set-executionpolicy remotesigned
get-executionpolicy
查看winrm service listener
https方式的使用5986,http使用5985
winrm enumerate winrm/config/listener

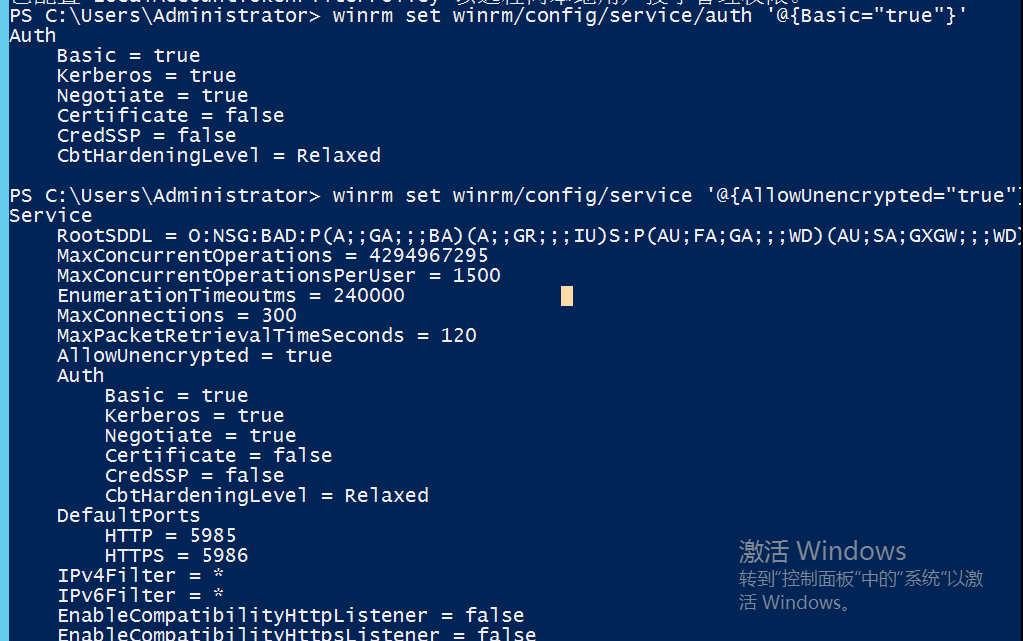
配置winrm服务
winrm quickconfig
配置auth 为true(默认为false)
winrm set winrm/config/service/auth '@{Basic="true"}'
配置允许非加密方式
winrm set winrm/config/service '@{AllowUnencrypted="true"}'
安装ansible依赖包pywinrm模块
pip install pywinrm
模块路径

常用模块
win_acl 设置文件/目录属主属组权限;
win_copy 拷贝文件到远程Windows主机;
win_file 创建,删除文件或目录;
win_lineinfile 匹配替换文件内容;
win_package 安装/卸载本地或网络软件包;
win_ping Windows系统下的ping模块,常用来测试主机是否存活;
win_service 管理Windows Services服务;
win_user 管理Windows本地用户。
使用方法可以直接阅读源码中的说明
/usr/lib/python2.7/site-packages/ansible-2.4.1.0-py2.7.egg/ansible/modules/windows/
ansible配置inventory
用户名密码使用windows普通用户账号即可,端口使用之前查到的5985,注意不是3389
[test-group]
test-01 ansible_host=IP ansible_ssh_port=5985 ansible_ssh_user=USER ansible_ssh_pass=PASSWD ansible_connection=winrm ansible_winrm_server_cert_validation=ignore ansible_winrm_transport=ssl
测试一下
ansbile test-group -m win_ping
返回如下信息则成功
test-group | SUCCESS => {
    "changed": false,
    "failed": false,
    "ping": "pong"
}
标题:jenkins编译.net结合ansible操作windows进行发布
作者:fish2018
地址:http://www.devopser.org/articles/2019/07/26/1564120107776.html